Link to the my Chip 8 toolchain repository:
https://github.com/FlyingFish800/Chip-8-Interpreter-Java
Link to a demo
Back in 2021 I discovered the Chip 8 instruction set from a video on youtube of someone writing their own interpreter for it. It looked like a really cool project to spend some on my extra quarantine freetime on, so I went to the technical reference they used and started to work on my own interpreter.
Chip 8 is a great first introduction to computer systems and architecture, especially if you go down the route of writing your own interpreter. It utilizes concepts such as registers and individual instructions, and the thought processes required to program a processor at such a low level. Writing a Chip 8 interpreter and assembler was a great introduction to low level computing, and writing a tron-like game with the limitations of the processor was also a really fun and rewarding experience.
My interpreter uses separate threads to handle the graphics and process CPU instructions, and the threads are kept in sync by a flag set by the processor every time it updates the screen. Input from the keypad is also handled by the graphics thread, and sent back to the CPU every time it requests the state of a key. An unexpected problem I had when testing before I demonstrated it to my highschool CS class was filepath differences between the schools Windows computers and the Linux computers I had developed it on, which taught me a valuable lesson in writing platform independent code.
The assembler was an even more interesting challenge for me as I had never done any project that needed to process and manipulate so much data before. I used a very simple approach of adding intermediate tokens to an ArrayList to communicate the information from the parser to the generator, which then converted it into an ArrayList of the machine code bytes to be written to the output file. This simple assembler was surprisingly robust, especially with how accurate the label address determination turned out.
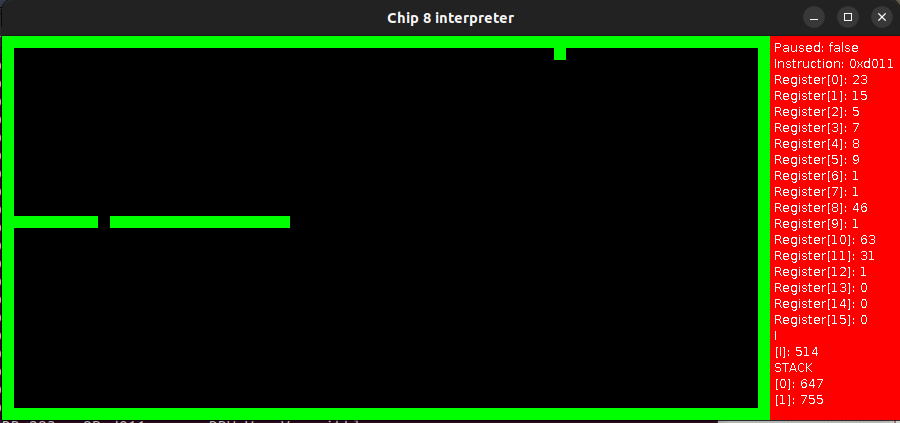
When I had my interpreter and assembler working well enough, I wanted to make a simple snake-like game using my own toolchain to experience what game development for this system was like. I immediately decided to add a ‘feature’ where the trails behind the snake did not follow the head like it normally would, since drawing the head and redrawing the tail would more than double the amount of time it took to process one movement, which was not a luxury I could afford at a flat 60 instructions per second. One quirk of the Chip 8 system that is particularly useful is that drawing to the display occurs as an XOR operation, where if any pixel was overridden back to a 0 the flag register is set. This allowed me to check for collisions in a single conditional skip instruction, only using one cycle to detect any form of collision with the snake, and only called a slower, more thorough collision detection subroutine in the downtime after a collision. The Chip’s XOR draw command did create a bug where when the ‘snake’ ran over a pellet a hole was left in its tail. I ended up turning this into another feature, as it created an interesting mechanic where you could avoid getting trapped in a box of your own tail (an issue compounded by the static tail) if you managed to pull off a pixel perfect input. Since it wasn’t really snake anymore and the concept was similar to the light cycles in Tron, I decided to name the game light_cycle.asm. I would recommend trying it out if you look at my code, it turned out really well.
A picture of the interpreter running the light cycle game with the red debugger panel enabled
